This post may contain affiliate links.Please read our disclosure policy.
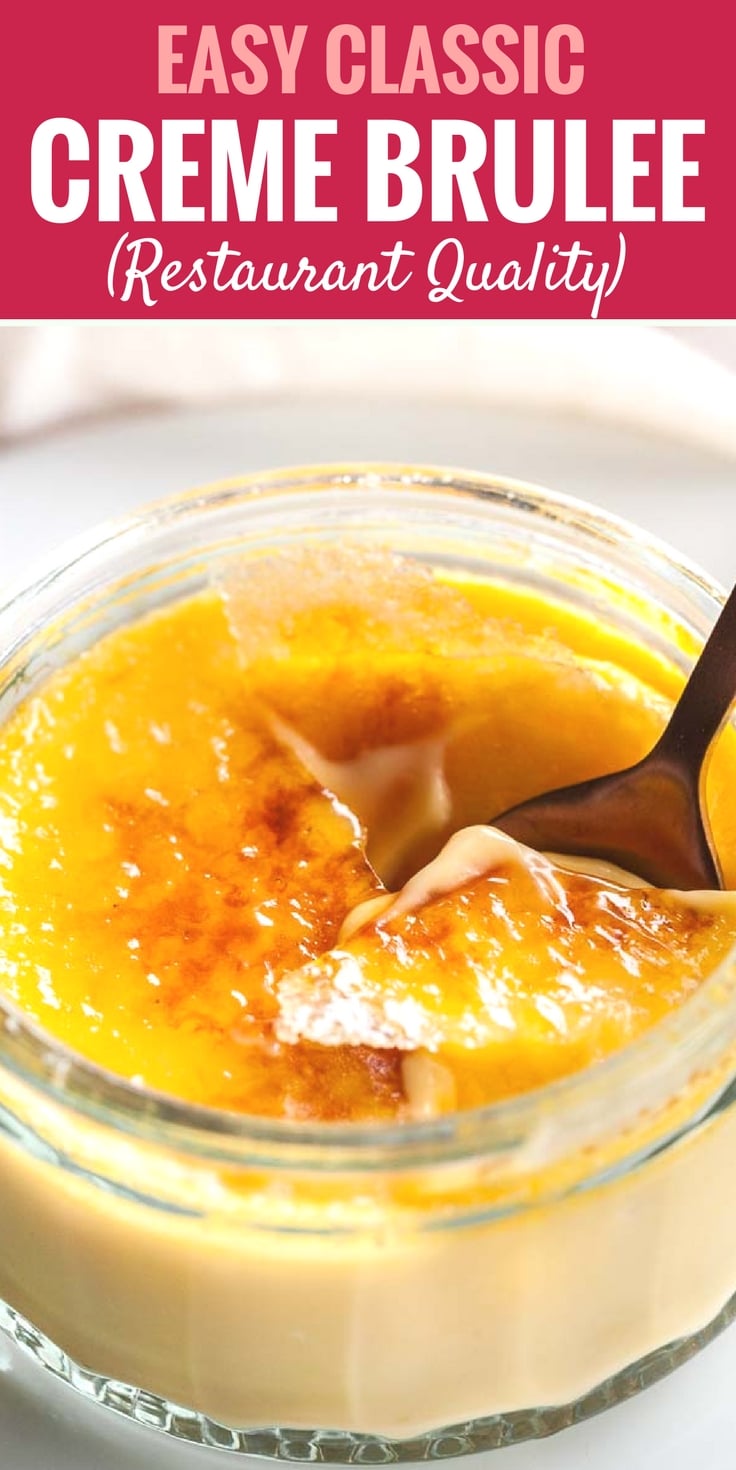
Creme Brulee is the perfect make-ahead dessert that will impress your guests! A silky, smooth vanilla custard topped with a layer of brittle caramel, that is easier to make at home than you think. This classic French dessert is very do-able and so delicious!
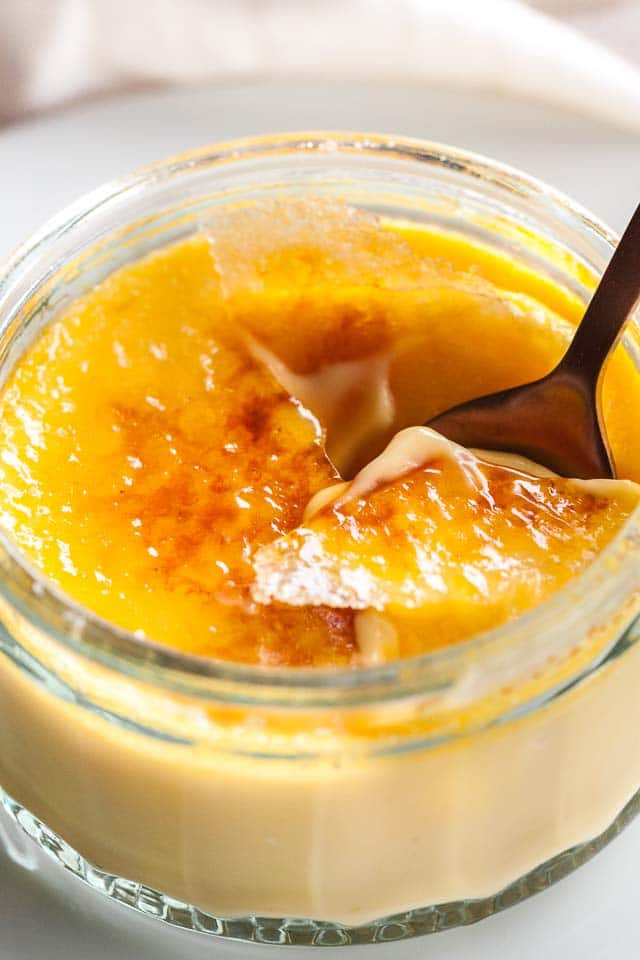
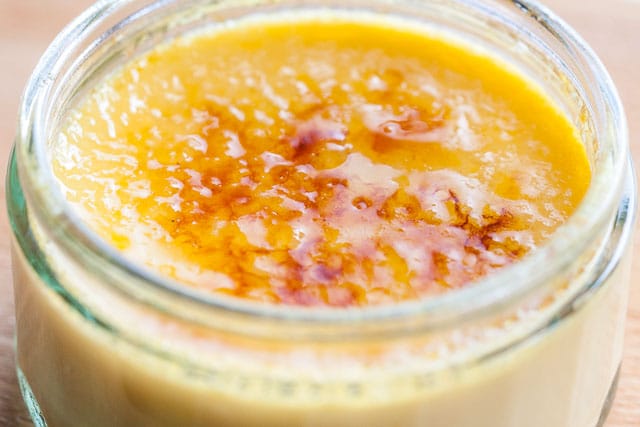
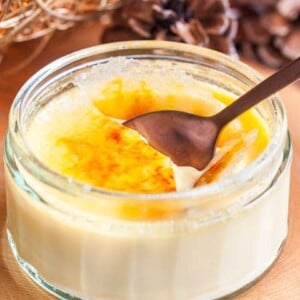
Creme Brulee is my favorite dessert! I really could eat this decadent treat every day. The contrast of the hard caramelized topping and the smooth and creamy vanilla custard is what makes this “burnt cream” so special and delicious.
Whenever I make this recipe everyone goes crazy for it! It actually tastes like in a fancy restaurant but is surprisingly easy to make at home. It’s perfect for special occasions and parties because you can make it a few days ahead, keep it chilled in the fridge and then add the sugar and torch it just before serving.
This makes a really impressive and memorable dessert for your guests! And yes, you really need a blowtorch in my opinion! I own one just for Creme Brulee. Putting it under a broiler might caramelize the topping but it also warms the custard and easily burns your French masterpiece.
Tips & Tricks for Making Creme Brulee at home
- Put the filled ramekins in the baking dish but don’t fill the baking dish with water until you’ve put it in the oven. It’s so much easier to fill the dish with water in the oven!
- Use a thermometer to check if the custard has the right temperature! You want it to be just set (about 155°F), overcooking the custard results in a weird eggy texture. I use this instant-read thermometer.
- Don’t cover the ramekins for the first hour in the fridge to avoid condensed water dripping into the custard. Cover them with plastic wrap after 1 hour.
- Use a small kitchen torch for caramelizing the topping! Using a broiler isn’t a good idea in my opinion because it’s unreliable and you can easily burn the whole thing.
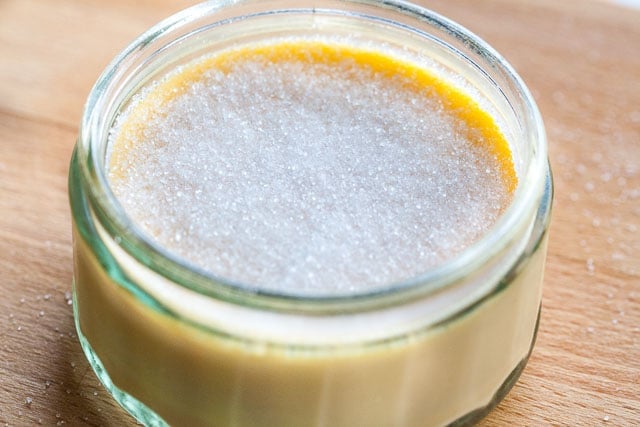
- I prefer using 2 tsp of sugar for the topping because I love caramel. If you want a thinner crust only use 1 tsp sugar.
What to do with leftover egg whites?
Leftovers egg whites are perfect for Coconut Macaroons or check out this helpful article from the Kitchn.
How to make Creme Brulee
Making Creme Brulee from scratch is not hard! Baking it in a water bath (called bain-marie) might sound intimidating but it really is easier to do than you think.
The first step is heating the cream. If you want to use a vanilla pod instead of vanilla extract let it steep in the cream while it is cooling down to 165°F. Whisk egg yolks and sugar together, then add the cream, vanilla extract, and orange liqueur. Pour the mixture through a sieve and divide it between the ramekins.
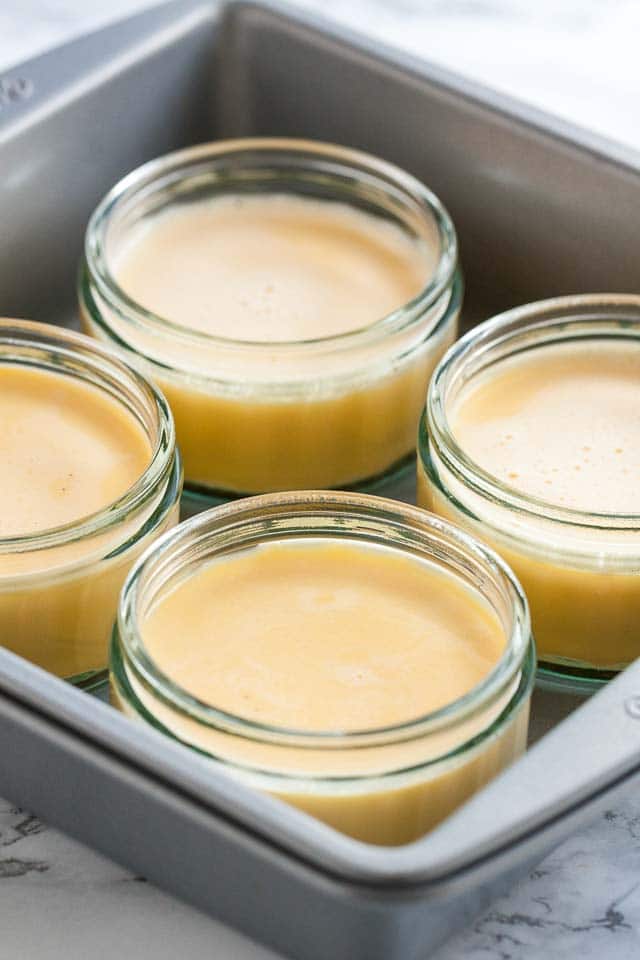
Put the ramekins in a large enough baking dish and transfer the pan to the oven. Fill it with hot water and bake the vanilla custards for about 50-55 minutes, until the edges are set and the center is slightly jiggly like Jello. If you have an instant thermometer (I highly recommend getting one) stick it in the center of a ramekin, it should register between 150° to 155°F.
Then remove the pan carefully from the oven and remove the ramekins from the water bath. This works best with a folded tea towel or oven mitt. Let them cool for 30 minutes at room temperature then transfer them to the fridge but don’t cover them! After one hour wrap each ramekin with plastic wrap and chill for up to 3 days.
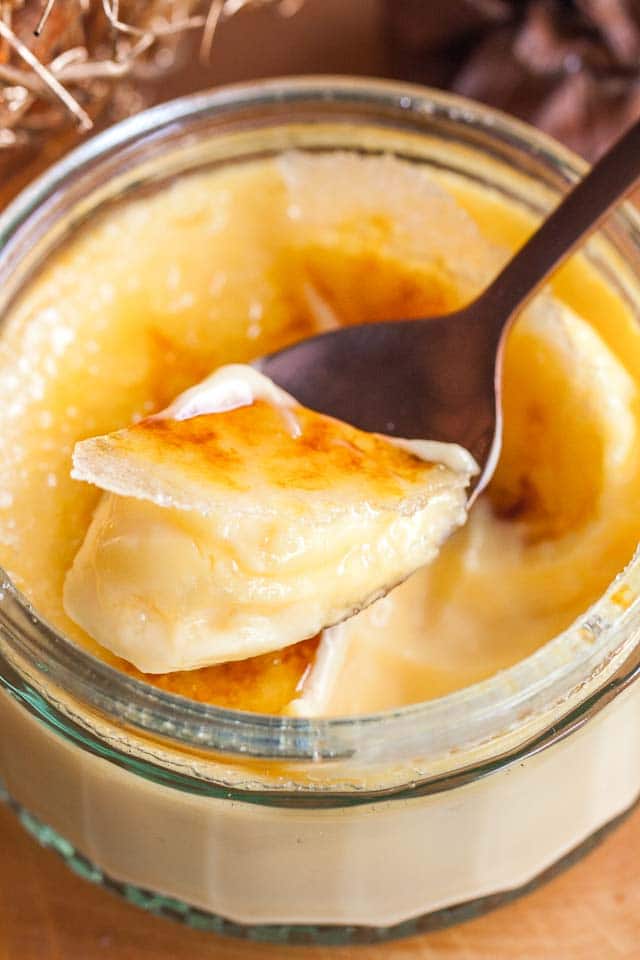
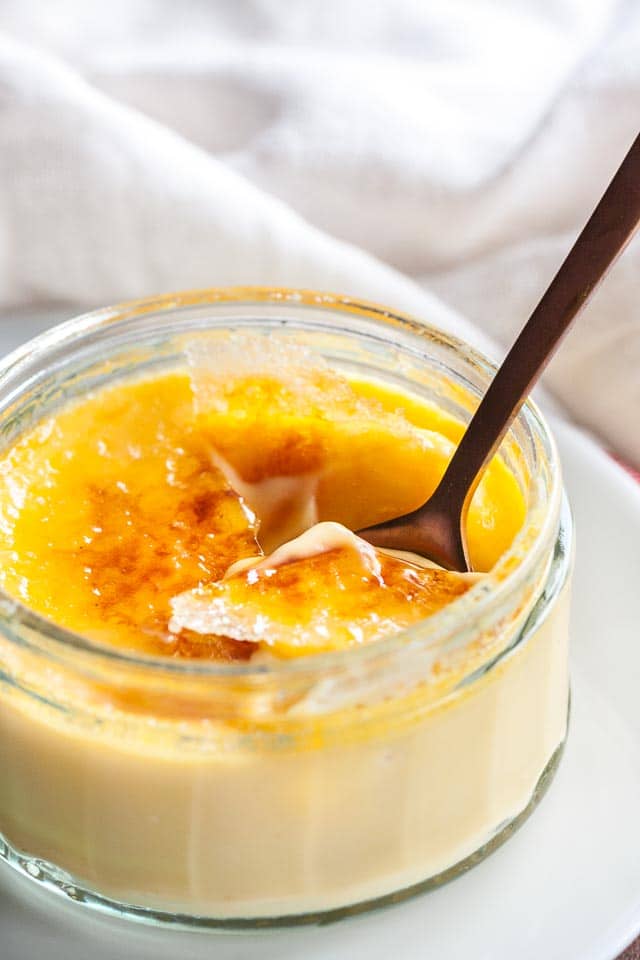
Now comes the best part! Torching them! Sprinkle the chilled vanilla custard with 1-2 tsp sugar. I like to use 2 tsp but my husband prefers a thinner layer so I use 1 tsp for his Creme Brulee.
Now comes the scary part. Did I mention I’m a little bit afraid of fire?! But even I can do it so you should have no problems. Hold the torch flame 2-3 inches from the top of the custard and slowly glide it back and forth over the surface until the sugar caramelizes and turns a deep golden brown.
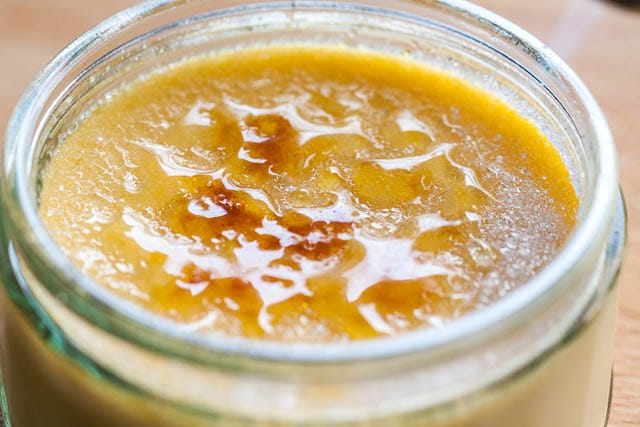
Don’t torch it too long (because you don’t want to warm up the custard) but long enough so that all the sugar is caramelized.
Don’t let the caramelized Creme Brulee sit too long because the top layer will otherwise soften and get sticky. Serve it immediately! I like to do the torching in front of my guests that makes it easier for me and everyone enjoys the experience.
Looking for more impressive but easy to make desserts?
- Easy Lemon Curd Mousse
- Chocolate Mousse Cake
- No Bake Oreo Cheesecake Parfaits
- Cranberry Upside Down Cake
Tools Used for Making Creme Brulee
Kitchen Torch: I highly recommend using a torch for this recipe! It makes it so much easier to caramelize the topping.
Ramekins: These ramekins are perfect for creme brulee but they are quite pricey. I have a big collection of small glass ramekins that came with store-bought desserts and are the perfect size.
Thermometer: I love this Instant-Read thermometer! It’s cheap and perfect to check the temperature of things like a roast, turkey, chocolate or creme brulee. Everyone should have one of these in their kitchen!
[social_warfare buttons=”Pinterest, Facebook”]
Classic Creme Brulee Recipe
Ingredients
- 1 1/2 cups heavy cream, (360ml)
- 3 large egg yolks
- 1/4 cup granulated sugar, (50g)
- 1 Pinch salt
- 1 tsp vanilla extract
- 1 tsp Grand Marnier, optional
For serving:
- 3 Tbsp granulated sugar
Instructions
- Preheat oven to 300°F (150°C) and position the rack in the center.
- Put four small (5oz.) ramekins in a baking dish that's at least as deep as the ramekins.
- In a small saucepan over medium heat, bring the cream to a simmer then remove it from the heat, cover, and let cool for 10 minutes (the temperature should be no higher than 165°F or 73°C).
- In the meantime, combine egg yolks, 1/4 cup sugar, and a pinch of salt in a medium bowl. Whisk until combined.
- Then slowly add 1/2 cup of the warm cream to the sugar-egg-mixture while stirring constantly. Stir for 30 seconds with a whisk.
- Then slowly, with a light hand stir in the remaining cream. You don't want the mixture to be frothy!
- Add the vanilla extract and orange liqueur (if using) to the bowl and stir lightly until combined.
- Pour the mixture through a fine sieve into a measuring cup with a spout then divide it evenly between the ramekins.
- In a large pot or teakettle bring water to a boil. Transfer the baking dish with the ramekins to the oven. Then slowly pour hot water into the baking pan until the water comes about 2/3 up the sides of the ramekins. Be careful not to get any water in the ramekins.
- Cover the baking pan loosely with aluminum foil.
- Bake the custards for about 50-55 minutes, until the edges are set and the center is slightly jiggly. If you have an instant thermometer stick it in the center of a ramekin, it should register between 150° to 155°F (65° to 70°C).
- Remove the baking pan from the oven and carefully take the ramekins out of the water bath. Let them cool at room temperature for 30 minutes then transfer them to the fridge (don't cover them). Once they are refrigerator-cold wrap them with plastic wrap. Refrigerate for at least 4 hours or up to 3 days before proceeding.
- Prior to serving, sprinkle 1 tsp sugar over each custard, one at a time. Tilt and tap the ramekin to even out the layer of sugar.
- Hold a torch flame 2-3 inches from the top of the custard and slowly glide it back and forth over the surface until the sugar caramelizes and turns a deep golden brown.
- Allow the sugar to cool and harden for 30 to 60 seconds, and then serve immediately.
Nutrition


If the heavy cream is 7.5 cups then it will not be 360ml it will be more 360ml is for almost one cup
This recipe calls for 1.5 cups of heavy cream, not 7.5 cups.
I’ve made this several times over the last few years. Every time it comes out perfect. Almost makes it hard to order at restaurants now that I can make it at home. So thrilled to have this on my Christmas Eve dinner menu yet again this year!
Hi Julia!
I really love this recipe and would love to know where you purchased the clear ramikens. Been looking for a set and these are perfect! Do share
I think they came from a premade dessert I bought at Costco.
Beautifully written instruction with lots of helpful hints.
Thank you❣️
My mama used to make “baked custard” for holidays and special occasions. She added Christmas seasonings. She didn’t like to use the broiler, so she made a rich butter and brown sugar (think almost caramel)drizzle to add after custards were plated.
She also loved boiled custard!
Such a versatile, smile producing dessert. Thank you!