This post may contain affiliate links.Please read our disclosure policy.
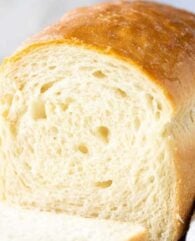
This White Bread recipe is a classic you’ll want to keep on hand. So light, fluffy and incredibly soft. Everyone will think it came right from the bakery!
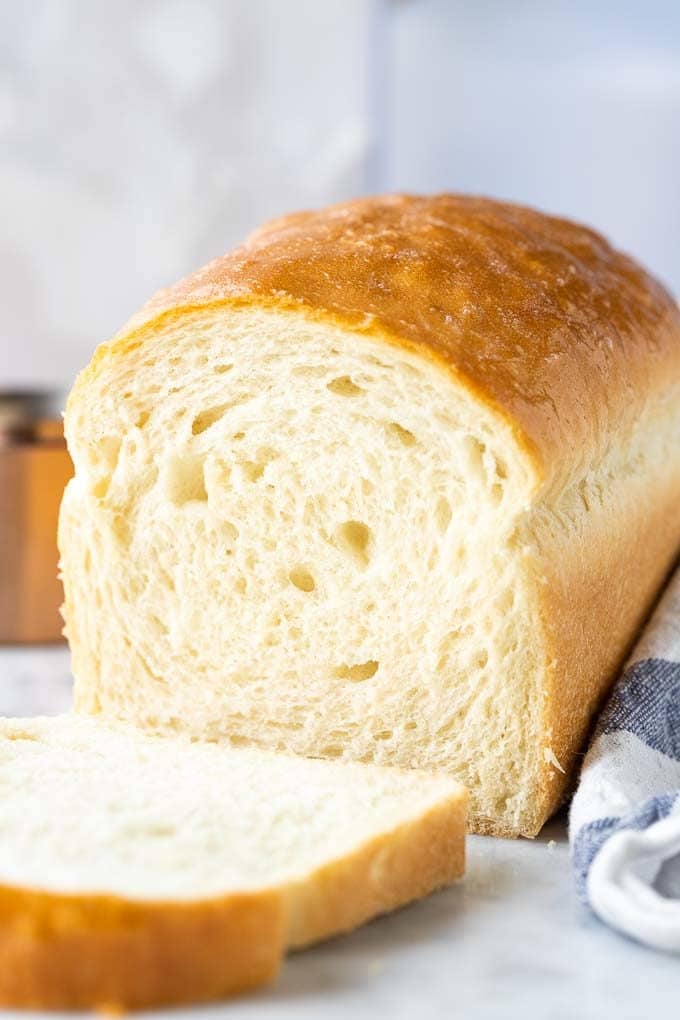
Is anyone out there a bread lover, just like me? I love a good slice of bread, and homemade fresh, soft white bread right out of the oven is my weakness.
We love using this bread recipe for Air Fryer Fried Chicken Sandwiches, as a dipper for Roasted Tomato Soup, or as an appetizer with our easy smoked salmon dip. Don’t forget it makes a great side dish too, especially when served alongside Chicken Mushroom Pasta.
This simple white bread recipe does not disappoint when it comes to quality and flavor. No matter what you use it for, whether its prepping school lunches, making yourself a snack, or serving it as your dinner side, you’ll be in sliced bread heaven.
No need to buy the low-grade store-bought loaves, or spend all your money on expensive bakery bread, you can make this recipe at home any time you want!
Tips and Tricks for Making White Bread
- 1 package of instant dry yeast usually contains 2 1/4 Tsp
- This recipe works with all-purpose and bread flour. The bread flour will give it a slightly chewier and a bit more elastic crumb.
- The second rise will be much faster than the first rise. Be careful not too overproof or the bread will not rise while baking and collapse.
- Don’t use an oil spray to grease your non-stick baking pans! Oils spray will ruin the surface of those pans, better use a paper towel or brush with some oil or butter.
- My house is pretty cold so I like to use the proof setting on my oven.
- The amount of flour you need depends on the moisture and temperature in your house. Some days you might need more, some days less!
- This recipe can be halved to make only one 8×4-inch loaf but it can also be doubled to make TWO large 9×5-inch loaves! Just use the little slider in the recipe card next to servings to double the recipe. Make sure your stand mixer can handle the amount of flour. I recommend using a KitchenAid Professional
Why Should I Make My Own White Bread?
Making your own bread is actually very simple, and not nearly as complex as you would think. In just over 2 hours you can have a fresh out of the oven loaf of white bread, and that’s with 1 hour and 30 minutes of just waiting for it to rise.
The time it takes to prepare is so worth the peace of mind you have knowing exactly what’s in the bread you are eating. When it’s made at home you don’t run the risk of any added preservatives, it’s like having bakery-fresh bread all the time.
It’s incredibly light and fluffy, and dare I say even better than any bread I’ve bought from the store. It’s the perfect texture you want for all of your bread needs.

What To Use Homemade Bread For
You can use your homemade white bread for anything and everything! Well, maybe not everything, but pretty close.
Use it to make your breakfast toast and nut butter, your turkey and cheese lunch sandwich, or mid-day snack avocado toast. Those are just a few of my favorite uses, but the options are really endless.
How To Store Homemade White Bread
Place in a Bread Box:
A bread box, while a little old school, is still very effective. If you have one or have the room for one, I suggest storing your loaf in there. It will give it the best odds of staying fresh as long as possible.
Wrap it in plastic wrap or foil:
If you want to just leave the white bread out on the counter, instead of in a bread box, you’ll need to cover the loaf with either plastic wrap or foil to prevent it from drying out.
Or a good hack would be to save an old store-bought bread sleeve and store your homemade loaf in there.
Freeze it:
To get more bang for my buck, I always make two loaves or even double the recipe to make two extra-large loaves, and immediately slice and freeze one to save for later. That way once I run out of the first loaf I already have another on hand and ready to eat
If you want a slice right out of the freezer, just pop it in the microwave for 20 seconds or toaster and you’ll be good to go. Or if you have the time, just let it thaw on the counter for a few hours.
Tools and Ingredients Used For Making This White Bread Recipe
For this recipe, you’ll want to pull out the big stand mixer you probably never use. Using a powerful stand mixer helps kneed the dough, allowing you to get that perfect end result.
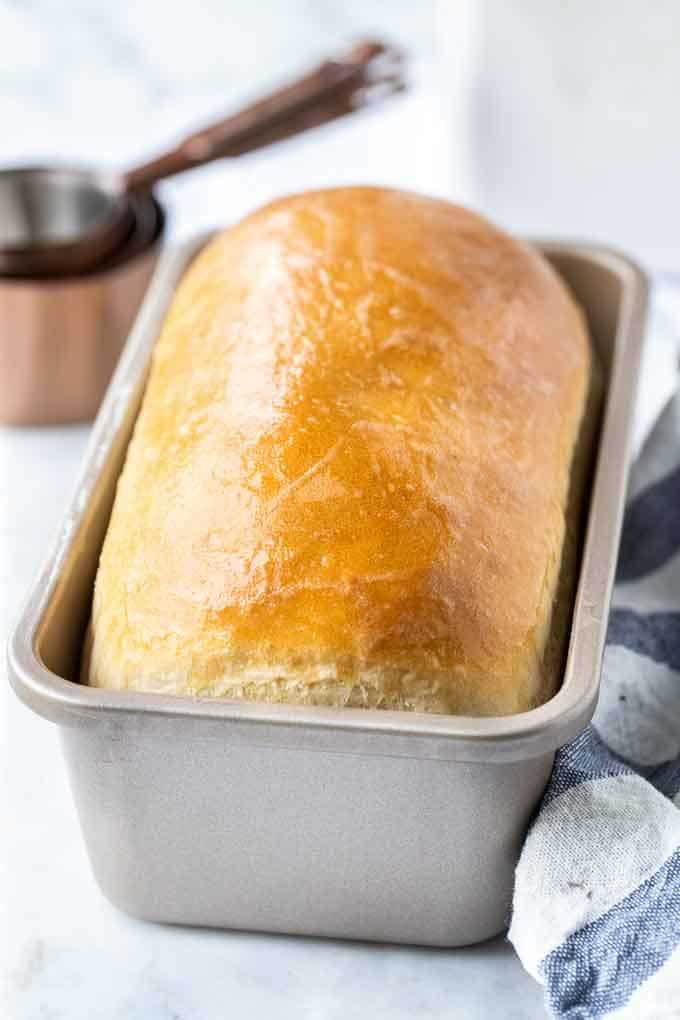
I love a good metal, nonstick loaf pan, it’s so versatile and can be used for an infinite amount of recipes.
WANT TO TRY THIS WHITE BREAD RECIPE?
PIN IT TO YOUR BAKING BOARD TO SAVE IT OR SHARE ON FACEBOOK!
Follow Plated Cravings on Pinterest for more great recipes!

White Bread
Equipment
- 2 Loaf Pan 8×4-inches
Ingredients
- 1 ⅔ cups lukewarm water, divided
- 2 ¼ teaspoon instant yeast, or active dry yeast
- 1 teaspoon sugar
- 1 tablespoon honey, (or more sugar)
- 1 teaspoon salt
- 1 ½ tablespoons unsalted butter, cubed at room temperature
- 4 ½ cups all-purpose flour, divided
- 1 ½ tablespoons butter, melted for brushing
Instructions
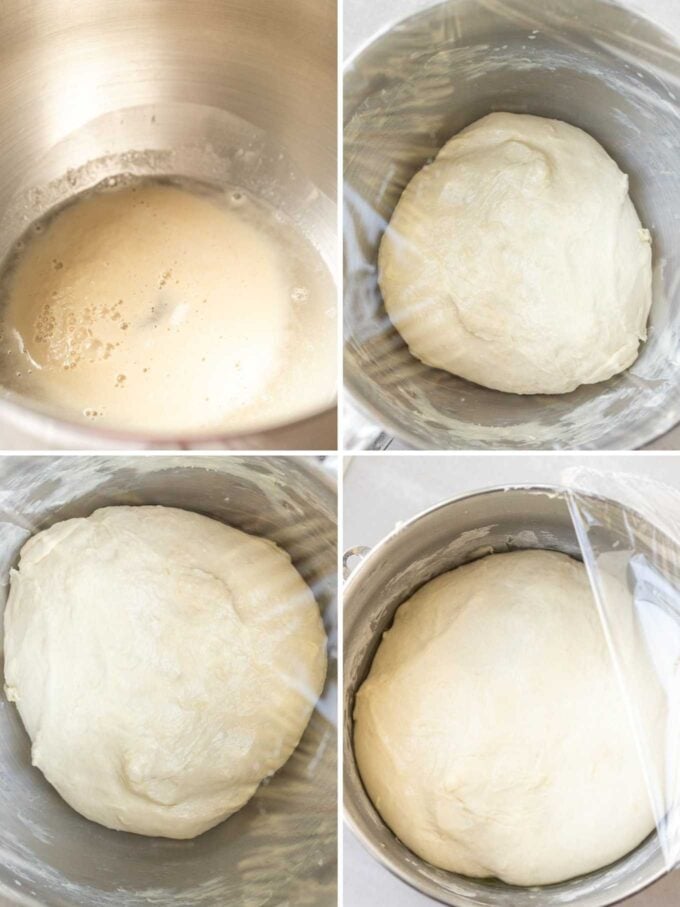
- In the bowl of a stand mixer fitted with the dough hook combine the instant yeast, sugar, and half of the lukewarm water. Let sit for 5-10 minutes until foamy (if using active dry yeast, let sit for 15 minutes).
- Add the remaining water, honey, salt, cubed butter, and 4 cups of flour to the bowl. Knead at low speed until the dough comes together and is soft but not sticky. Add a few more tablespoons of the remaining flour if necessary. Continue to knead for 6–9 minutes until the dough pulls away from the sides of the bowl and is soft and smooth.
- Transfer the dough to a lightly greased bowl and make sure that it is completely coated. Cover with plastic wrap and let rise in a warm and draft-free place for about 45 minutes, or until doubled in size.
- Lightly flour your work surface and turn out the dough onto it. Divide it into two equally sized portions. Use your fingers to gently pat each half into a 8×12 inch rectangle while pressing it all over to remove any air pockets. Starting at the short end, roll up the rectangle into a tight roll and pinch the seams to seal. Tuck the ends of the roll slightly under the roll to create some tension on the surface and place each loaf into a greased 8×4 inch loaf pan tucked ends and seam side down. Cover with a greased piece of plastic wrap and let rise for about 45 minutes in a warm and draft-free place until doubled in size.
- Preheat oven to 390 degrees F and adjust oven rack to lower-middle position.
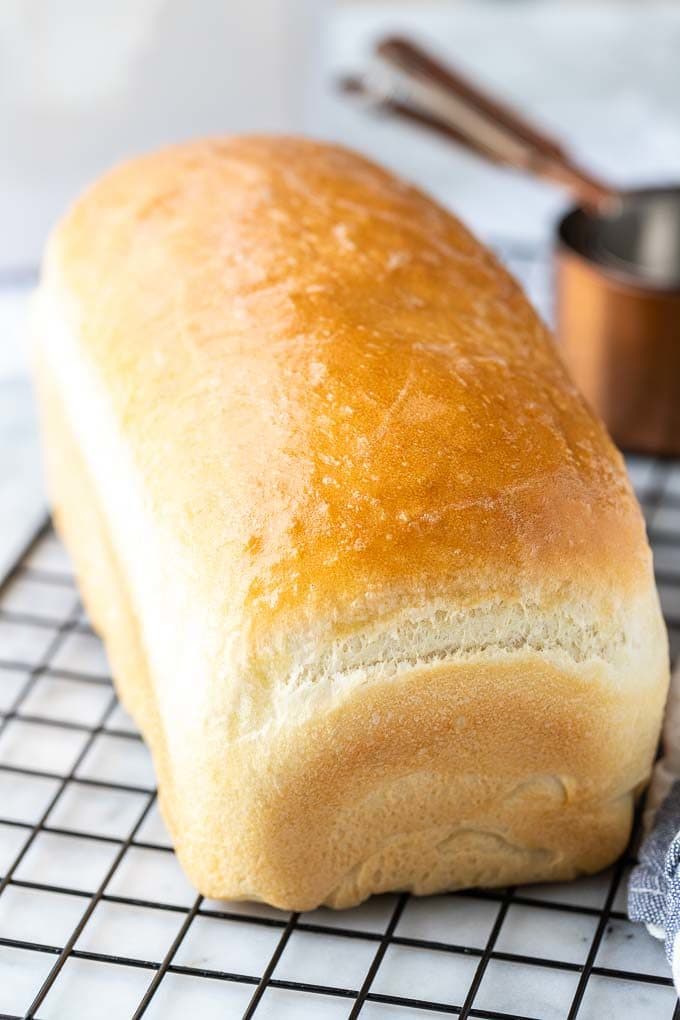
- Bake loaves for 25–30 minutes until golden brown (and the loaf registers 208 to 210 degrees).
- Invert bread onto a cooling rack. Reinvert loaves and brush the tops and sides with melted butter. Let cool completely before slicing.
Notes
- Pan Size: This recipe makes 2 regular loaves baked in two 8×4-inch pans, or one large loaf baked in a 9×5-inch loaf pan. To make one large loaf, don’t divide the dough into two and pat it into a 9×13-inch rectangle. Bake for 30–35 minutes. Some readers commented that their 9×5 loaf was too big, so I recommend using two 8×4 pans.
- No stand mixer: This bread can be kneaded by hand if you don’t have a stand mixer. Use a large bowl and knead the dough for 10 minutes.
- Bread Machine: I have successfully made this bread in my Oster Bread Machine using half the recipe. Depending on the size of your bread machine, you can make one big loaf or half the recipe and make a smaller loaf. The bread won’t be as pretty, but the taste and texture will be the same.
- Butter: Salted butter will work too. I would still add the tsp of salt because the amount of butter is so small. You could reduce to 3/4 tsp salt if you are sensitive to salt. Vegan Butter or margarine can also be used.
- Fresh Yeast: You can also use fresh yeast for this recipe! 2 1/4 teaspoons instant yeast = 21 grams fresh yeast or 1 1/4 blocks (0.6-ounce size) or about 1/2 block (2-ounce size) fresh yeast.
- Rapid Rise Yeast: Rapid rise yeast is the same as instant yeast, so no changes are necessary.
- Flour: This recipe works with all-purpose and bread flour. You can use whichever you have on hand! Bread flour will give it a slightly chewier and a bit more elastic crumb, which I really like, but most people don’t have bread flour in their pantry, so I made sure this recipe works as well with all-purpose. I don’t recommend using self-rising flour. You need 4–4 1/2 cups of flour for this recipe.
- Lukewarm Water: Water should be warm, not hot. Between 95 F and 110 F is perfect.
- Baking Temperature: Yes, the temperature is correct!


This was soooo good!! I didn’t change a thing and followed it to the T! I only had a 9.5×5.25 bread pan and it still worked with all of it! The loave was just much larger! Lol I just got a pullman pan today and was going to experiment to see if this would work in that! I have no clue on cooking time or how large to spread the dough out! I’m not good with experimenting and making my own so I’m very thankful for those of you who post their recipes!! The pullman pan is 13×4. So I’m guessing to spread the dough out at least 13inches wide then whatever in length to roll it up. It also has a lid to make more square slices. I’m thinking it may work since the top was so large on my 9.5 pan! But would you also bake this for 30-35 mins or would you go for the 20-25 minutes? Or what’s the best way for me to tell when baking if there’s a lid? Thank you again for an awesome recipe!!
How did the recipe turn out with your Pullman loaf pan?
I made your bread today absolutely the best and so easy. My family loved it. Do you think you could use white whole wheat flour???? I was going to try but I thought I would ask and get your opinion first Thank you Bonnie
I haven’t tried that so I’m not sure. Whole wheat flour usually needs more liquid. Let me know how it goes if you give it a try!
How many packets of dry yeast makes 2 and a half tsps
Depends on the size of your package, most of the time one package. But you could always measure with a teaspoon.
The only thing I add to the recipe is I leave out the honey and replace it with raisin paste because one it is sweet and two it acts as a natural preservative. where a fresh made loaf of bread may last about 9 days unfrozen unrefrigerated like a loaf of bread from the store. If you add raisin paste it’ll actually last about 18 days. And I save the honey to make honey butter with cinnamon spread.
Thank you for the recipe – delicious! I did half water and half milk. I misread a step and added the butter to the top when I first put it in the oven which I believe made it browner.
Ummm… Yum!!!! So I made this today but instead of separating it to different loafs I just put it in a round pan. And since I didn’t have an plastic wrap I used a proofing basket that I bought on Amazon and used a grocery bag. It came out fluffy and perfect!!!! Thank you so much for this recipe since Im new to baking and decided to just start baking my own bread instead of wasting money at a grocery store to buy already packaged bread that is not fresh! I’m so glad that I was able to find this recipe. ❤️❤️❤️❤️ The bread reminded me so much of my daughters, father’s, mother’s Bosnian bakery and the bread she use to make everyday. ❤️❤️❤️
I’m sure there is nothing wrong with your recipe because this happens no matter what recipe I use. It rose perfectly first time, and I didn’t split the dough. So I put it all in a 9×5 pan and the second rise went perfectly, but I could tell when I took it out of the oven, that it was very heavy. When it cooled I cut it and it had the consistency of cake rather than bread. I don’t know what I’m doing wrong, but all of my bread turns out the same. Any Ideas?
It should definitely not come out like cake. You most likely didn’t knead for long enough, the more you knead the dough the more the gluten bonds form. Did you knead the dough by hand or did you use a stand mixer?
I was just about to say the same …first and second rise went very well …Then I put the tins into the oven and … Nothing .
IIM going to my kitchen now and knead the dough a bit longer 🤞🤞🤞
Thanks x
Easy to make with my 12 year old grandchild. Daughter didn’t have issue with taking the second loaf.
Simple! Came out perfect! I swapped out some of the water for milk
Hi! Would this work in a round La Creuset bread pan?
I haven’t tried that so I’m not sure. Let me know how it went if you give it a try!